Skip to content
 You want to build a safe water storage tank that keeps water clean and secure for a long time. Using the right materials and welding tools is crucial for ensuring safety and strength. Many tanks fail due to leaks, algae growth, or damage from animals and sunlight. HDPE is an excellent choice because it doesn’t rust, withstands impacts, and prevents most issues common in other tanks. With the proper tools and careful workmanship, you can create a durable water storage tank on your own or with a team.
Key Takeaways
-
HDPE is strong and light. It does not rust. It does not get damaged by sunlight. It does not get harmed by chemicals. This makes it great for water storage tanks.
-
Think about the tank size and shape you need. Make sure it fits your water use and space. Use 3D models or CAD drawings to help you cut and fit parts exactly.
-
Use MM-Tech welding machines for building. Clean the HDPE sheets well. This helps make strong joints that do not leak and last a long time.
-
Add fittings and openings with care. Test for leaks using pressure or dye tests. Always wear safety gear when you build the tank.
-
Take care of your tank by cleaning it every six months. Keep it out of direct sunlight. Check it often to keep water safe and the tank strong.
HDPE and Water Storage Tank Basics
Why Choose HDPE
When you make a water storage tank, you want it to last. The material should keep water safe for a long time. High-density polyethylene (HDPE) is a great choice for this. Here are some reasons why people pick HDPE:
-
Durability and Resilience: HDPE can handle hard hits and bad weather. It does not rust like steel. You will not need to fix it as much.
-
Chemical Compatibility: You can put many liquids in HDPE tanks. It holds water, acids, and alkalis without leaking or breaking.
-
Lightweight: HDPE is lighter than steel or concrete. This makes it easier to move and set up.
-
Seamless Construction: Many HDPE tanks do not have seams. This helps stop leaks and keeps water clean.
-
Sustainability: HDPE can be recycled. It also takes less energy to make than other materials.
Tip: HDPE is safe for drinking water. It costs less than steel or fiberglass tanks.
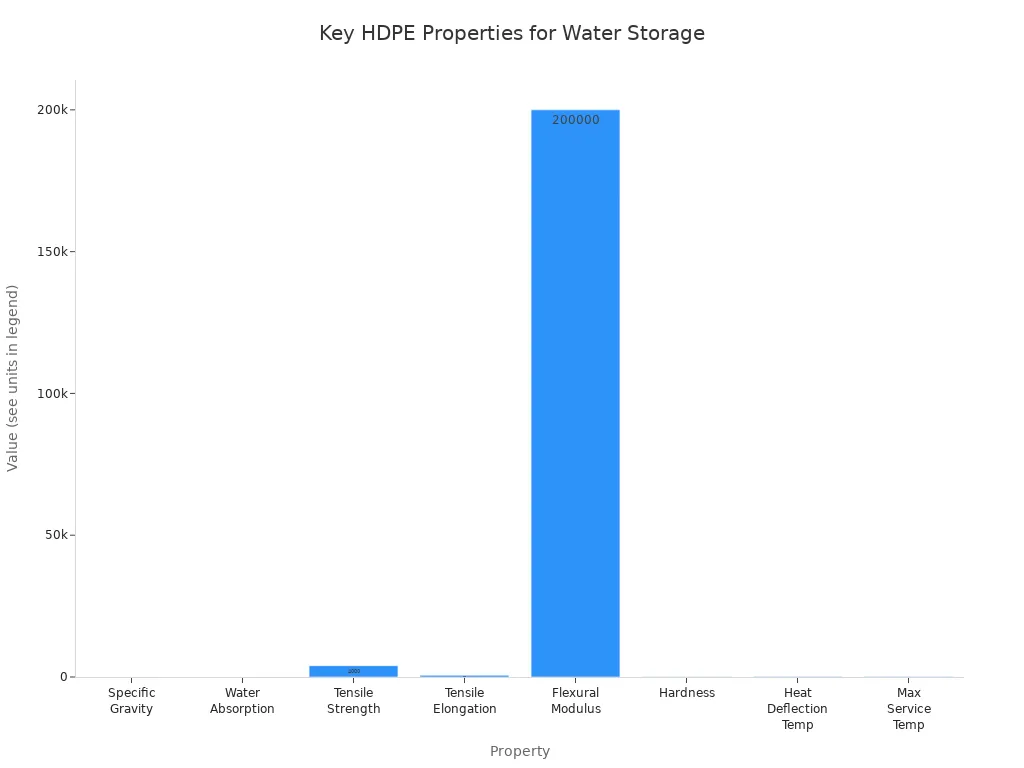
Key Properties for Water Storage
HDPE has special features that make it good for water tanks. Its strong structure gives it high strength and a high melting point. This means your tank can handle heavy use and hot days.
-
HDPE does not let most chemicals in. It will not put bad things in your water.
-
It blocks UV rays. This stops algae from growing and keeps the tank strong outside.
-
The material does not soak up much water. It stays strong even when wet.
-
HDPE is safe for drinking water. It does not change the taste or smell.
Here is a table that compares tank materials:
| Tank Material | Typical Lifespan | Durability Factors |
|---|---|---|
| HDPE (Plastic) | Can get damaged by UV and heat | |
| Steel | Up to 50 years | Needs coatings and care to stop rust |
| Concrete | 30 years or more | Stands up to UV, heat, and rust |
| Stainless Steel | Up to 100 years | Very strong and does not rust |
You can see that HDPE is safe, strong, and easy to use. If you pick HDPE for your tank, you get something you can trust. It is also easy to put in and take care of.
Planning and Materials
Design and Sizing
You need to plan your water storage tank before you start building. First, think about how much water you want to store. The size should match your daily needs and fit the space you have. Many people choose tanks that hold at least 2,500 gallons for fire safety and home use. If you have a large property, you may need a tank that holds 5,000 gallons or more. You can also use several tanks together if you need extra capacity.
The shape of your tank matters too. Vertical tanks save floor space, while horizontal tanks give you a larger surface area. Check your local codes for minimum requirements. Make sure the tank fits your space and meets safety rules. Pick a spot that is easy to reach for cleaning and repairs.
Tip: Place your tank above ground if you want easy access. Choose below ground if you want to save space or protect the tank from sunlight.
Materials and Tools List
You need the right materials and tools to build a strong tank. Here is a list to help you get started:
-
High-density polyethylene (HDPE) resin or sheets
-
UV stabilizers to protect against sunlight
-
Colorants for appearance
-
Sleeve slots for fittings like faucets and drain pipes
-
Release agents for easy mold removal (if using molds)
-
Hollow metal molds and rotational molding machines (for molded tanks)
-
Cutting tools and measuring tape
-
Welding machines and safety gear
A table can help you organize your materials:
| Material/Tool | Purpose |
|---|---|
| HDPE resin/sheets | Main tank body |
| UV stabilizer | Sun protection |
| Colorant | Tank color |
| Fittings | Water inlets/outlets |
| Welding machine | Joining HDPE parts |
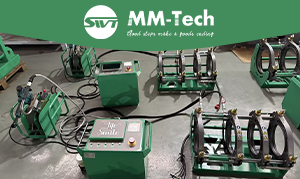
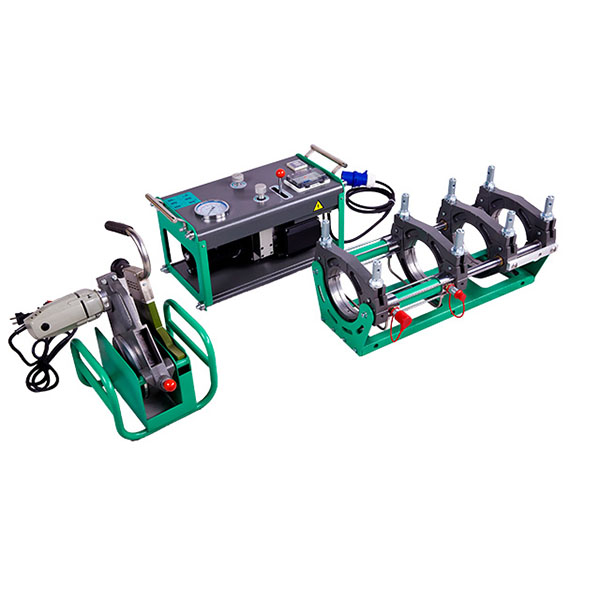
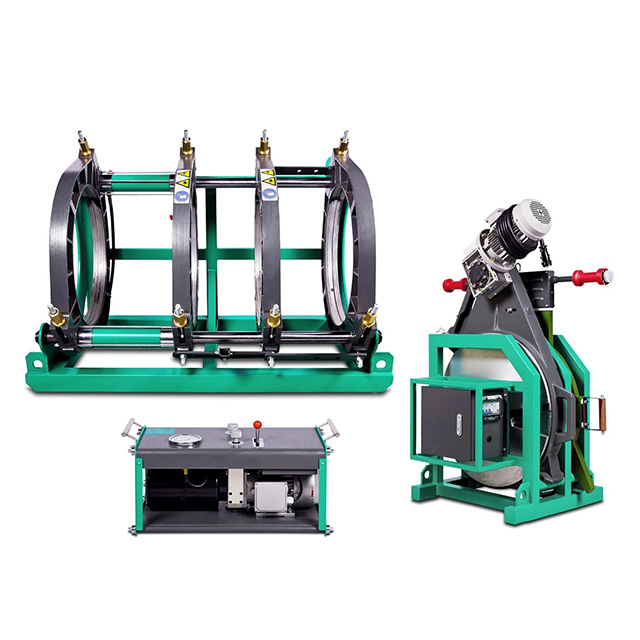
MM-Tech Welding Equipment
You want strong, leak-free joints in your tank. MM-Tech welding equipment helps you achieve this. These machines let you weld HDPE sheets and pipes with high precision. You can adjust the temperature and pressure for different materials and thicknesses. MM-Tech machines have CE certification, which means they meet strict safety and quality standards. The ergonomic design makes them easy to use, even for long projects. Many users trust MM-Tech for reliable welds and good support. You get consistent results and peace of mind when you use these tools for your water storage tank.
Building the Water Storage Tank
Preparing HDPE Sheets
Start by preparing your HDPE sheets for the best weld quality. Clean every sheet before you begin. Remove dirt, oil, grease, dust, and debris with a lint-free cloth. For greasy spots, use isopropyl alcohol, but avoid harsh cleaners. Use a soft brush to get rid of loose dirt. Always clean both the HDPE sheet and the welding rod. Clean your tools and gloves, too, so you do not transfer any contaminants. If you see a dull or white layer on the plastic, scrape it off with a sharp scraper or rotary tool until you see shiny plastic. Even if the sheet looks clean, always scrape the welding area. This step helps you get strong, lasting welds.
Keep the HDPE sheet temperature at or below 50°C during welding. This prevents over-melting, which can weaken the weld seam. In hot climates, use white HDPE sheets because they reflect sunlight and stay cooler. Avoid welding if the sheet temperature goes above 75°C. High temperatures can cause weak, brittle welds. Good temperature control and clean materials help your water storage tank last longer.
Cutting and Marking
Cutting and marking HDPE sheets accurately is important for a leak-proof tank. For thin sheets, use a utility knife and ruler. Score both sides along your measured lines, then snap the sheet cleanly. For thick sheets, use a table saw with a blade made for plastics. Mark your cutting lines clearly with a scribing pen before you cut. Secure the sheet firmly to keep it from moving. Cut slowly and steadily to avoid heat buildup and melting. For curves, use a jigsaw with the right blade and control your speed for smooth edges. After cutting, sand or file the edges to remove rough spots.
Always wear safety gear like goggles, gloves, and a dust mask. Marking is just as important as cutting. Use a ruler and scribe to mark both sides of the sheet. For complex tanks, create a 3D model or CAD drawing first. These tools give you exact measurements and help you plan the layout. CAD drawings also help you avoid mistakes and make sure every part fits together. In the workshop, use your CAD drawing to mark the real sheets. Double-check every point before you cut.
Tip: 3D modeling and CAD drawings help you see the whole tank before you build it. They make your work faster and more accurate.
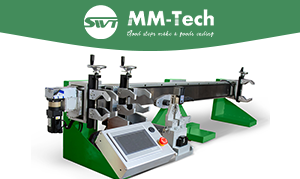
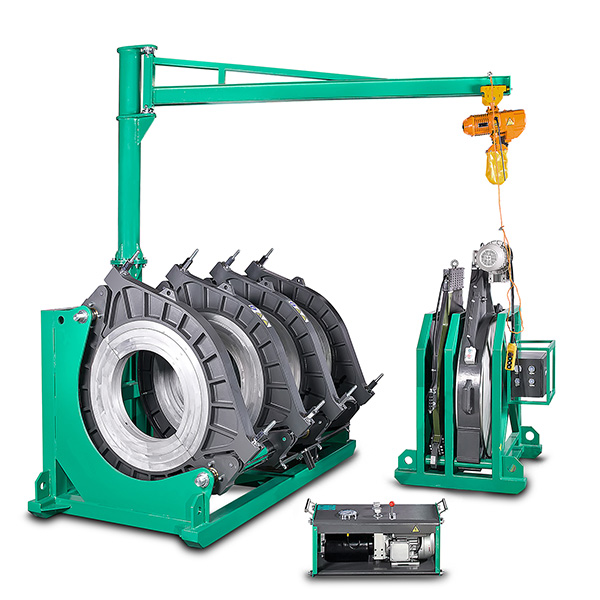
Welding with MM-Tech Butt Fusion Machine
Welding the main parts of your water storage tank requires strong, leak-proof joints. The MM-Tech Butt Fusion Machine gives you precise control over temperature and pressure. Start by cutting your pipes or sheets to the right length. Clean the ends thoroughly. Secure the pieces in the butt fusion machine and make sure they line up perfectly. Use the facing tool to plane the ends until they are smooth and parallel.
Set the heating plate temperature between 220°C and 260°C. Heat the ends until they melt evenly. Remove the heating plate and press the molten ends together with the right amount of force. Keep the pieces clamped and let the joint cool naturally for 5-10 minutes. This step is important for a strong bond. The MM-Tech machine helps you monitor every parameter, so you get consistent results every time. Shield your workspace from wind and cold to keep the heating even.
Note: Always follow the MM-Tech user manual for safety and best results.
Using Extrusion Welder for Joints
For thick HDPE sheets and large tank joints, use an extrusion welder. This tool lets you make strong, continuous welds in a single pass. Draw the welding rod into the hand-held extruder and plasticize it. Apply the plasticized rod against the parts you want to join. Use a jet of hot air to soften the HDPE parts before bonding. This method works best for materials thicker than 6 mm.
Extrusion welding creates solid, durable welds with fewer weak points than other methods. It is fast and efficient, saving you time and labor. The welds are strong enough to handle the pressure and stress inside a water storage tank. Use the right welding shoe size for your sheet thickness. The MM-Tech extrusion welder gives you precise control, so every joint is clean and reliable.
Adding Openings and Fittings
You need to add openings and fittings for pipes, valves, and other connections. Common fittings include flanges, bulkheads, and spooling fittings. Place these on the top, sides, or bottom of the tank, depending on your design. Mark the locations using your CAD drawing or 3D model. Drill holes with the correct size bit and clean the edges.
Install fittings by following the manufacturer’s instructions. For bulkhead fittings, place the gasket and lubricate the threads. Tighten carefully to avoid damaging the gasket. For flanges, use bolts and gaskets, but do not over-tighten. Always hydro test the fittings for at least 24 hours to check for leaks before using the tank.
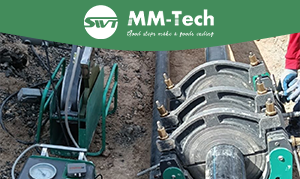
When welding pipe fittings or supports, use butt fusion or electrofusion methods. Cut pipes perpendicular to the axis and clean the ends. Scrape the ends to remove oxidation, then clean with isopropyl alcohol. Insert the pipe into the fitting and clamp it in place. Use the MM-Tech machine to control temperature and pressure. Let the joint cool before removing the clamp.
Safety Tip: Always wear gloves and eye protection when welding or installing fittings.
Handles and supports can be welded to the tank using the same extrusion welding process. Mark their positions clearly and weld them securely. This makes your water storage tank easier to move and maintain.
Safety, Quality, and Maintenance
Leak Testing and Inspection
After you finish building your water storage tank, you need to check for leaks and make sure it is safe. Start with a visual inspection. Look for cracks, bulges, or water stains, especially around joints and fittings. Next, fill the tank with water and perform a pressure test. Watch for drops in water level or damp spots outside the tank. You can also use dye testing by adding a safe colored dye to the water and checking for color leaks. For more advanced checks, use acoustic sensors to listen for leaks or thermal cameras to spot temperature changes caused by escaping water.
Here is a table of common leak testing methods:
| Method | Description | Tips for Use |
|---|---|---|
| Visual Inspection | Look for cracks or stains | Check all joints and corners |
| Pressure Testing | Fill and pressurize with water | Do not exceed safe pressure |
| Acoustic Detection | Listen for leak sounds with sensors | Use in quiet areas |
| Thermal Imaging | Use infrared camera to find temperature changes | Best during temperature swings |
| Dye Testing | Add colored dye and watch for leaks | Use safe, visible dye |
You should also check the tank’s structure. Inspect for pinholes or flaws right after construction. Test the tank’s strength by tapping or pressing on the walls. Use ultrasound to check wall thickness. Always keep records of your inspections.
UV Protection and Hygiene
Sunlight can damage your HDPE tank over time. UV rays break down the plastic, causing cracks and leaks. To protect your tank, place it under a shelter or in the shade. You can also paint the tank or use a cover. Some tanks come with UV stabilizers built in. These steps help your tank last longer and stay strong.
However, more UV protection can sometimes lead to more bacteria or algae inside the tank. Clean your tank regularly to keep the water safe. Use a water-safe hose and filters when filling the tank. Add water treatment chemicals if needed. Always keep the tank closed to stop dirt and bugs from getting in.
Tip: Clean your tank every six months to prevent algae and keep your water fresh.
Maintenance Tips
Regular maintenance keeps your water storage tank safe and working well. Empty and clean the inside and outside of the tank. Use bright lights to look for cracks, brittleness, or wear. Pay close attention to fittings, gaskets, and where the tank walls meet the top or bottom. Check the dome, but do not walk on it. Inspect all hoses and connections for leaks or corrosion.
Make sure vents are clear and not blocked. Do not overfill the tank, as this can cause damage. If you have a secondary containment system, check that it is in good shape. Plan for professional inspections every year. These may include ultrasonic thickness checks and material tests. Always follow the manufacturer’s manual for care and repairs.
Remember: Good maintenance helps your tank last longer and keeps your water safe.
If you follow each step, you can make a safe tank. Use good HDPE and MM-Tech welding tools for strong joints. These joints will not leak or rust and can handle pressure. Clean and check your tank often to find problems early. Install the tank the right way to keep water clean. Always disinfect your tank and keep it out of the sun. Doing these things helps your tank last longer and keeps your water safe.
FAQ
How do you choose the right thickness for HDPE sheets?
You should match the sheet thickness to your tank size and use. For small tanks, use 6–10 mm sheets. For large or underground tanks, use 15 mm or thicker. Thicker sheets give more strength and last longer.
Can you repair a leak in an HDPE tank?
Yes, you can fix small leaks with an extrusion welder or a hot air gun. Clean the area, then weld a patch over the leak. Always test for leaks after repairs. For large cracks, replace the damaged section.
What safety gear should you wear when welding HDPE?
Wear heat-resistant gloves, safety goggles, and a dust mask. Use long sleeves and pants to protect your skin. Good ventilation helps keep fumes away. Always follow the safety instructions in your welding machine manual.
How often should you clean your HDPE water tank?
Clean your tank every six months. Drain all water, scrub the inside with a soft brush, and rinse well. Use only water-safe cleaning products. Regular cleaning keeps your water safe and your tank in good shape.
Can you use MM-Tech welding machines for other plastics?
Yes, you can use MM-Tech machines for HDPE, PP, PPR, and PVDF. Always check the machine settings for each plastic type. Follow the user manual for best results. MM-Tech machines work well for many plastic welding jobs.