Skip to content
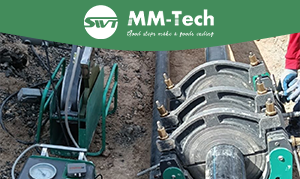
 You use the water retaining plate welding process to make strong joints. These joints keep water from leaking in construction. This process helps you build water barrier systems that work well. They stop leaks from happening. Using the right technique, materials, and equipment is important. This makes sure the results last a long time. If you work carefully, you get good protection from water.
Key Takeaways
Pick the correct welding shoe size for the plate thickness. This helps make strong welds that last and stops leaks. – Keep the temperature and pressure the same during welding. Make sure surfaces are clean before you start. This helps make joints that do not let water through. – Always do quality control tests to check for leaks early. Fix any leaks you find to keep your water barrier safe and strong.
Welding Methods
Hot Air Welding
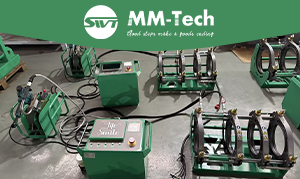
You start the water retaining plate welding process with hot air welding. You use a hot air gun with different nozzles to make the first connection. For best results, choose welding-type nozzles. These nozzles give you a strong and solid bond. You can also adjust the angle easily, which helps during maintenance. When you use the right nozzle, you get a reliable start for your water barrier system. Hot air welding works well for thermoplastic plates. It lets you control the heat and pressure, so you avoid damaging the material.
Extruder Welding
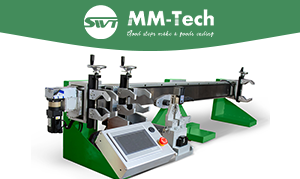
After you make the initial connection, you use an extruder welder for reinforcement. You attach a V-shaped welding shoe to the extruder. The type of welding shoe depends on the thickness of your plate. For thin plates, use smaller shoes like K8 or K10. For thicker plates, use larger shoes such as K15, K20, or K30. This choice helps you control the heat input and makes sure the weld is strong. A good match between shoe size and plate thickness gives you a durable water barrier.
Welding Shoe Type | Plate Thickness | Application |
|---|---|---|
K8/K10 | Thin | Precise, low heat |
K15/K20/K30 | Thick | Strong, deep weld |
Welding Steps
Surface Preparation
You need to start with a clean surface before you weld water retaining plates. A clean surface helps you get a strong weld and a reliable water barrier. If you skip this step, you risk weak joints and leaks.
Here are the main steps for surface cleaning:
Remove the mill scale, which is the oxide layer from manufacturing.
Get rid of any rust on the plate.
Clean off oil, grease, and paint.
Use grinding wheels or wire brushes to take away dirt and other contaminants.
Wipe the surface with an approved solvent to remove any leftover grease.
Check that the surface is clean and smooth. This helps the weld fuse well and prevents defects.
Rivet Operation
After you clean the surface, you move to the rivet operation. This step uses a hot air gun with special nozzles. You use the hot air gun to heat the plate edges. Then, you press them together and use a rivet tip to make small, strong points of connection. These rivet points hold the plates in place and set up the next welding steps.
Make sure you keep the temperature steady. Too much heat can damage the plate. Too little heat can make the joint weak.
Press the plates together firmly. Hold them until they cool down.
Space the rivet points evenly. This keeps the plates aligned and ready for reinforcement.
Further welding
Now you need to make the joint strong and watertight. You use an extruder welder with a V-shaped welding shoe. The shoe size depends on the thickness of your plate. For thin plates, use a small shoe like K8 or K10. For thick plates, use a larger shoe such as K15, K20, or K30.
Plate Thickness | Welding Shoe Type | Result |
|---|---|---|
Thin | K8/K10 | Precise, less heat |
Thick | K15/K20/K30 | Strong, deep fusion |
Set the right temperature on your extruder welder. This helps the plastic flow and bond well.
Apply steady pressure as you move the welder along the seam.
Keep a steady pace. Moving too fast can leave gaps. Moving too slow can overheat the plate.
Let the weld cool before you move the plate. This keeps the water barrier strong and prevents leaks.
Note: Matching the welding shoe to the plate thickness is key. This gives you the best weld strength and keeps your water barrier reliable.
Quality Control
You must check your welds to make sure they are strong and leak-proof. Quality control helps you find problems before they cause leaks in your water barrier.
Here are some common tests you can use:
Low Voltage Electrical Conductance Testing: This test finds small leaks by checking if water can pass through the weld.
High Voltage Spark Testing: You use a charged tool to find holes or thin spots in the weld.
Flood Testing: You fill the area with water and look for leaks from below.
Spray Testing: You spray water at the weld to see if any leaks appear.
Check for these common problems:
Pinholes or tiny holes in the weld
Overlaps or gaps between plates
Weak joints that can break under pressure
If you find any of these, fix them right away. Good quality control keeps your water barrier safe and long-lasting.
Tip: Always control the temperature, pressure, and time during welding. This helps you avoid weak spots and makes sure your welds stay watertight.
You can make a strong water barrier if you follow these tips:
Pick the right welding shoe for the plate thickness. This stops leaks and makes the weld last longer.
Always watch the temperature and pressure for every weld.
Wear safety gear like helmets and gloves to protect yourself.
If you get ready and check your work, you can stop most weld problems.
FAQ
How do you choose the right welding shoe for your plate?
You match the welding shoe size to your plate thickness. Thicker plates need larger shoes for strong, deep welds.
Tip: Always check your plate thickness before you start welding.
What safety gear should you wear during welding?
You should wear gloves, a helmet, and protective clothing. These items protect you from heat, sparks, and fumes.
Gloves
Welding helmet
Protective jacket
Can you fix a weld if you find a leak?
Yes, you can repair leaks. Clean the area, then re-weld using the correct temperature and pressure. Always test the repair for leaks.