You need a necessary temperature of 260°C to 280°C to fuse a ppr pipe. Using the target temperature helps you avoid common problems:
Proper fusion keeps ppr joints strong.
Low heat causes leaks and weak points.
High heat deforms pipes and leads to failures. MM-Tech’s digital welding machine gives you precise control.
Key Takeaways
Set your fusion tool to 260°C to 280°C. This helps make strong joints that do not leak.
Use a digital fusion tool to check the temperature as you work. This stops the tool from getting too hot or too cold.
Always clean the ppr pipe surfaces before welding. Make sure the pipes are lined up straight to get a tight bond.
PPR Pipe Fusion Temperature
Ideal Temperature Range
You need to use the right temperature when you join ppr pipe. The industry standards, such as ISO 15874 and ASTM F2389, recommend a fusing temperature of 260°C ± 5°C. This means you should set your fusion tool between 260°C and 280°C when working with ppr. Most plumbing codes and manufacturers agree with this range.
PPR pipe fittings work well in temperatures from -10°C to 95°C.
You can use ppr pipe for both hot and cold water systems.
PPR pipe stays strong even in cold weather or hot water supply lines.
When you use ppr fusion tools, you must keep the fusion tool at the correct temperature. If you set the fusion tool too low, the ppr pipe will not melt enough. If you set it too high, the pipe can deform or burn. Always check the digital display on your fusion tool before you start heating the fusion tool.
Importance of Correct Heat
Getting the right heat is the most important step in fusing the pipe. When you heat the ppr pipe and fitting to the correct temperature, the material melts and forms a strong bond. This bond is as strong as the rest of the pipe. If you do not use the right heat, you can get leaks or weak joints.
Tip: Always use a digital fusion tool with real-time temperature monitoring to avoid mistakes.
Here are some problems you might see if you do not use the correct heat:
Defect Type | Description | Consequence |
|---|---|---|
Overheating | Too much heat melts the pipe too much. | The joint can deform or burn. |
Underheating | Not enough heat fails to melt the pipe properly. | The joint is weak and may leak. |
Inaccurate Time | Heating for the wrong amount of time. | The joint may crack or become loose. |
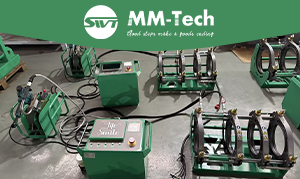
When you use the right fusion tool, you can avoid these problems. The MM-Tech ZRJQ-40T fusion tool gives you digital temperature control. You can adjust the temperature for different ppr pipe sizes and materials. The digital display shows you the exact temperature, so you always know if you are in the safe range. The fusion tool also has automatic temperature compensation and a heat-insulated handle for safety.
Many users choose MM-Tech ppr fusion tools because they are reliable and easy to use. The fusion tool helps you make strong, leak-free joints every time. Other brands may not offer the same level of temperature accuracy or safety features.
When you follow the correct steps and use a quality fusion tool, you make sure your ppr pipe system will last a long time. You avoid leaks, weak spots, and costly repairs. Always remember that the right temperature and the right fusion tool make all the difference when fusing the pipe.
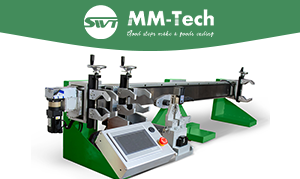
How to Join PPR Pipe with MM-Tech
Preparing the Welding Machine
To join ppr pipe with the MM-Tech ppr welding machine, you need to prepare your equipment first. Follow these steps:
Select the correct heating heads for your ppr pipe diameter.
Attach the heating heads securely.
Set the temperature between 260°C and 270°C. The digital display helps you adjust this easily.
Wait 10-15 minutes for the machine to reach the set temperature. The indicator light will turn off when ready.
Test the temperature using a strip if you have one.
Make sure the power supply is stable, especially if you work outdoors.
Tip: Never rush heating the fusion tool. Let it reach the right temperature for the best results.
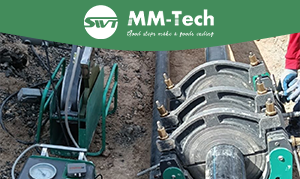
Heating and Fusing Steps
When you start heating the pipe and fitting, follow these steps:
Align the ppr pipe and fitting.
Place the heating plate between the ends.
Press the pipe and fitting gently against the plate. Wait for a small bead to form.
Remove the plate quickly and join ppr pipe ends together.
Apply steady pressure for a strong bond.
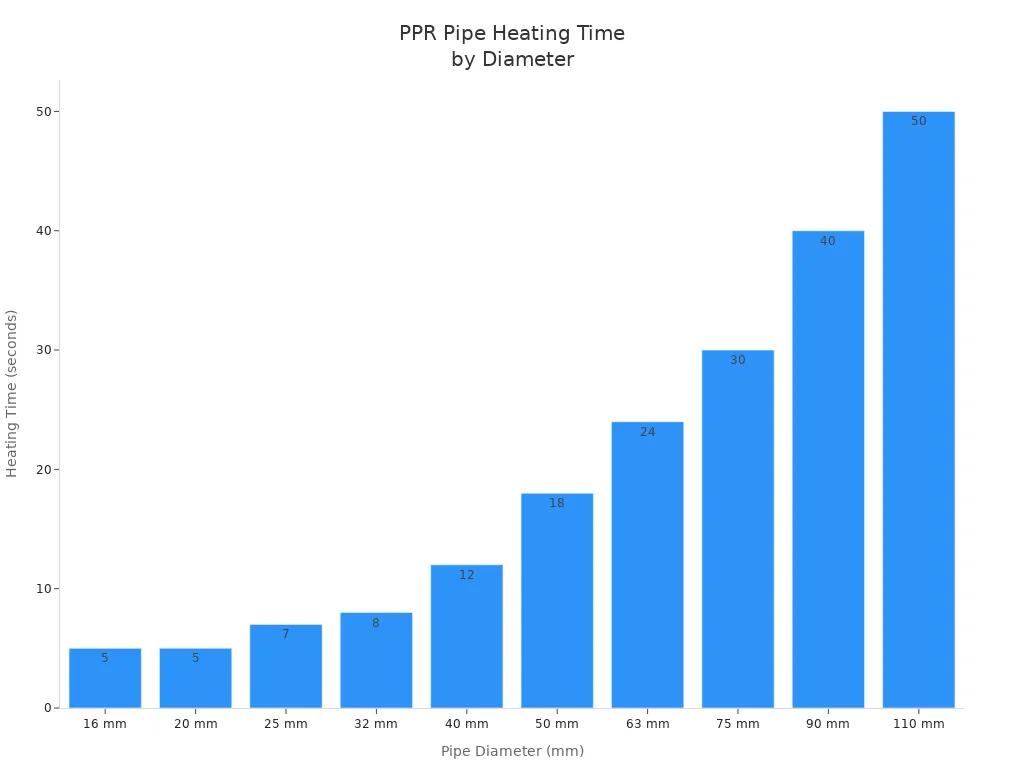
Use this table to check the minimum heating time for your ppr pipe size:
Pipe Diameter (mm) | Minimum Heating Time (seconds) |
|---|---|
16 | 5 |
20 | 5 |
25 | 7 |
32 | 8 |
40 | 12 |
Safety and Best Practices
Stay safe and get the best results when fusing the pipe and fitting:
Keep your workspace tidy and well-ventilated.
Inspect your ppr fusion tool before use.
Align pipes carefully to avoid leaks.
Allow the joint to cool before handling.
Use only compatible ppr fittings.
The MM-Tech ppr welding machine gives you real-time temperature monitoring, warning signals, and a user-friendly digital display. These features help you avoid overheating or underheating, making every joint strong and leak-free.
You need to use the right temperature to fuse ppr pipe. This helps make strong joints that do not leak.
Temperature (°C) | |
|---|---|
Safe operational range | 0 to 95 |
Short-term exposure | up to 110 |
Continuous operation | up to 70 |
MM-Tech’s welding machine helps you get good results every time.
Make sure ppr parts are clean and lined up before welding.
Always use the temperature that is recommended.
FAQ
What happens if you use the wrong temperature for ppr pipe fusion?
If you use the wrong temperature, the joint may leak or break. Always check your fusion tool before you start working with ppr pipe.
Can you reuse a fused ppr joint?
No, you cannot reuse a fused joint. Once you fuse ppr, the material bonds permanently. You need to cut and use new fittings for repairs.
How do you know the fusion is complete?
You see a uniform bead around the joint. The ppr cools and hardens. Wait a few minutes before moving or testing the connection.